
After the incredible investigation by the journalists associated with the Pegasus project, I got super interested in the Mobile Verification Toolkit (MVT) released by the Amnesty International Security Lab. I’m definitely not deluded enough to think I’m important enough to be targeted, but I did want to try the tool.
Pegasus
Long story short, Pegasus is a tool to hack cell phones. It’s zero-touch so targeted users don’t even need to click a malicious link. All of the anti-phishing training your company puts you through won’t help. I won’t do the story justice, so if you need a little background on the Pegasus project, I highly suggest reading the about page on Forbidden Stories. MVT is a forensic tool to detect a Pegasus compromised phone.
“A forensic tool for a technical audience”
Per the GitHub repo, the MVT is for a “technical audience” and “requires some technical skill.” I think I barely qualify. The developers have released some detailed installation instructions, but I still ran into some issues. Definitely start with the provided directions, but feel free to read further if you ran into some problems.
For anyone following along, I’m using an M1 MacBook Air running MacOS 11 (Big Sur) and running the tool to analyze an iPhone 12 Pro.
Installing Python 3
The tool is entirely command line based and is installed via PyPI, and requires Python 3. As of writing, MacOS ships with an out-of-date Python 2.7. The first step was to install Python 3. To install Python 3, the instructions suggested using Homebrew. I already had Homebrew installed, so it was as simple as running the below command in Terminal.
brew install python3
Having Python 2 and 3 (on a Mac anyway) is a bit weird. Running python in the command line will run the pre-installed Python 2. To run Python 3, you can use the python3 command. To test what version your python command runs you can use python --version, and to check your python3 command python3 --version.
Similarly, the pip command will run the Python 2 version and pip3 will run the Python 3 version. Pip is Python’s package installer and it’s how MVT is installed.
Installing MVT
The instructions provided a command to install MVT: pip install mvt. I modified the instructions to use Python 3 using pip3.
Even with pip3, I ran into a few errors as pip installed the necessary dependencies. Ultimately, I had to use sudo as well.
sudo pip3 install mvt
Decrypting an iPhone Backup
Now that MVT was installed, I could get to actually analyzing my backup. I made a fresh backup of my phone (more info on how to create backup an iPhone onto your Mac on the Apple support site). Since my backups are encrypted, I had to decrypt my backup first.
The instructions provided the following
mvt-ios decrypt-backup -p password -d /path/to/decrypted /path/to/backup
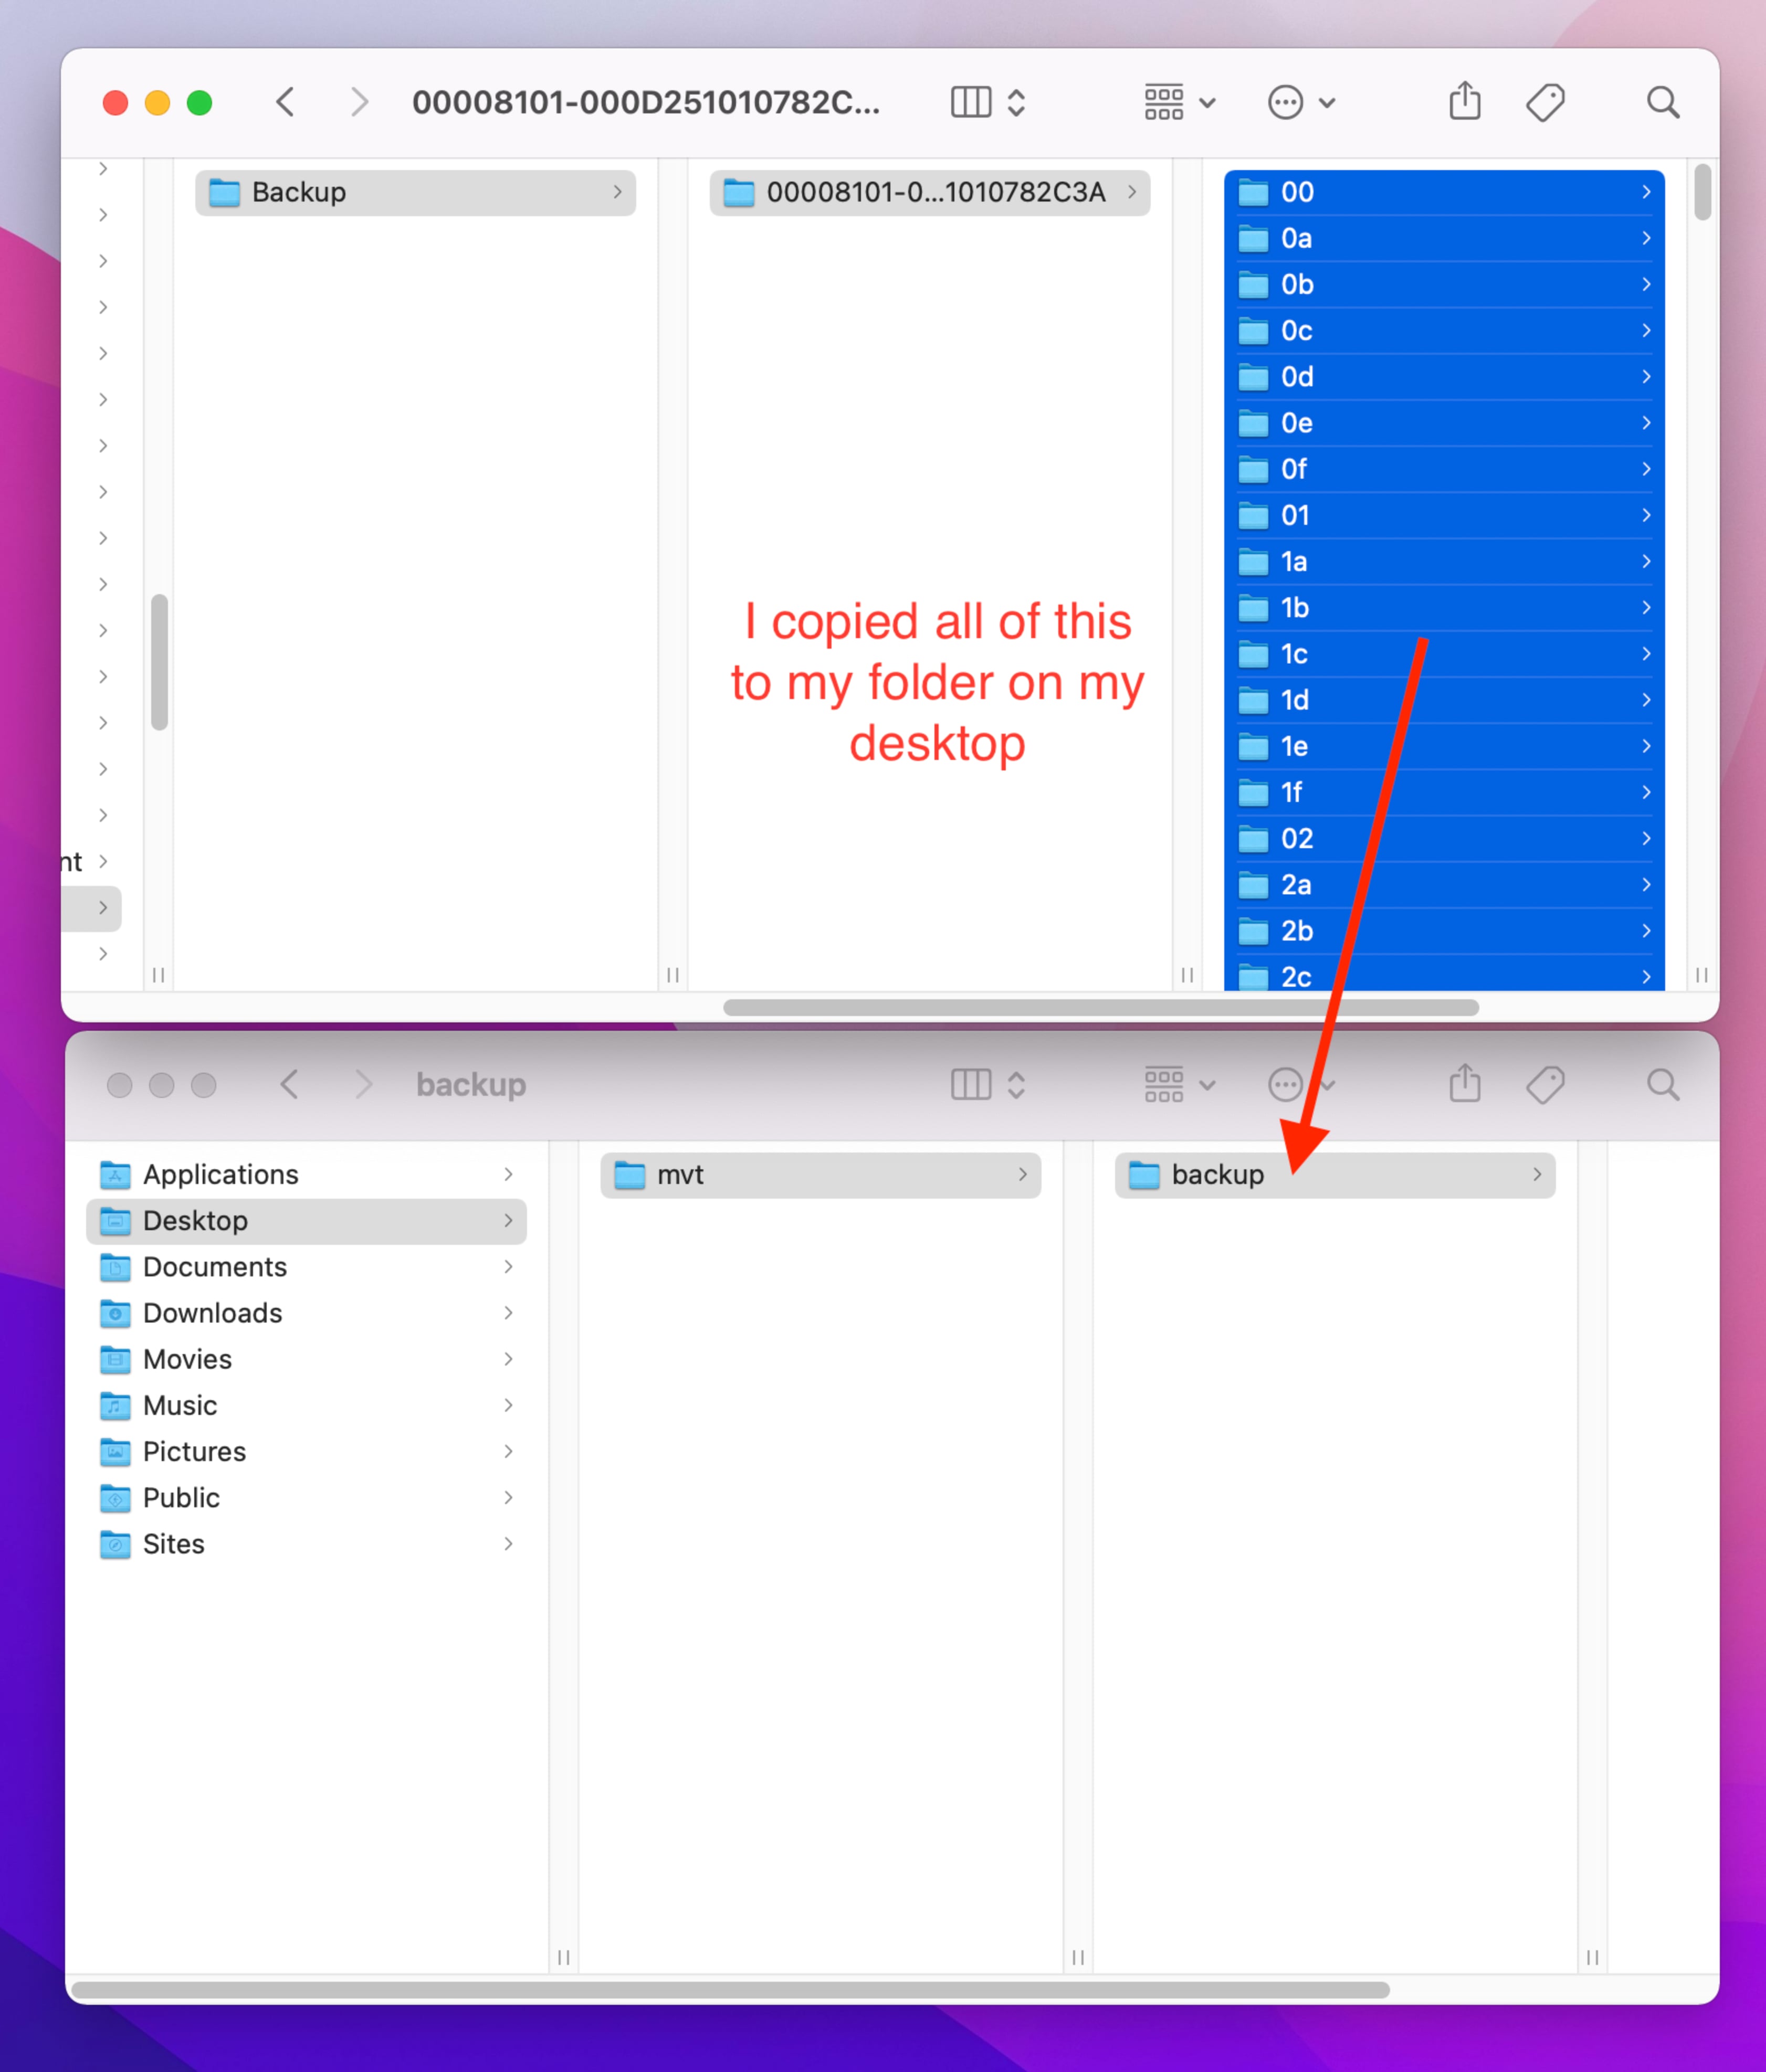
I ran into a few errors trying to point to the default backup directory ~/Library/Application Support/MobileSync/Backup/, so I had to copy my backup to a new directory. First I created a folder on my desktop called mvt, and another folder in that called backup. Next I went to the folder with my iPhone backup. An easy way to do this is to open Finder and in the menu bar click Go then Go to Folder.... In the pop up box paste ~/Library/Application Support/MobileSync/Backup and then click Go.
This took me to my folder with all of my device backups. Using the modified dates, I was able to figure out which was the iPhone backup I just created. The folder names are a long string of numbers, I opened that folder and copied all of the files and folders to the mvt/backup folder on my Desktop. I copied the folders that were two characters (like 00 or 0a) and a few files. It’ll look something like this:
Once the files have been copied to the desktop directory, I put the following into Terminal:
mvt-ios decrypt-backup -p My-Backup-Password -d ~/Desktop/mvt/decrypted ~/Desktop/mvt/backup
This created a decrypted copy of my backup in an mvt/decrypted folder on my Desktop. The decryption process took about 30 minutes for my 88 GB backup, but YMMV.
Checking my backup
The last step of the process was to use the MVT tool to check my decrypted backup. There are a lot of options for the tool, but I went with their suggested basic usage
mvt-ios check-backup --output ~/Desktop/mvt/ ~/Desktop/mvt/decrypted/
Several json files are created by the tool. If MVT detects any indicators, a separate json named *_detected.json will be created. Not surprisingly, nothing on my phone was detected.
Clean up
If you followed along and had an encrypted backup, this process created a decrypted backup on your computer. It might be prudent to delete it once you’re done running the MVT tool.
Additionally, your iPhone encryption password might be stored in your Terminal history. To view your Terminal history, you can use the history command. Deleting your Terminal history varies based on the shell you’re using. Shells are a little outside of the scope of this blog post, but if you want to delete your entire Terminal history, you can try either history -c or rm ~/.zsh_history.